How to Label Moving Boxes: The Ultimate Guide to an Organised Move
Unlock an organised and stress-free move with one simple trick: labelling. Discover the art and science of labelling moving boxes in this ultimate guide. Say goodbye to moving day chaos and hello to an organised transition.
14 min read

Key takeaways
- Box labelling unlocks organisation: Labelling your moving boxes is the key to a well-organised move.
- Label early, label often: Start labelling your boxes as you pack them to save time and prevent last-minute rushes.
- Label clear and consistent: Ensure your moving box labels are clear, readable, and consistent in style and placement for easy identification.
- Maintain a master list: Use contents labels together with number-based labelling systems to quickly locate specific items.
- Fragile equals special: Use specific box labels and handling instructions for fragile items to prevent damage during the move.
- All sides matter: Label all sides and the top of each box for easy identification.
- Tech accessories TLC: Label and pack electronics accessories separately to simplify setup at your new location.
Alright, my friends, gather around! I'm about to share some top-secret insider knowledge with you. Picture this: it's moving day and your home is a maze of cardboard boxes. You're playing the most frustrating game of hide-and-seek ever, trying to find out where on earth you packed your favourite coffee mug or your kid's beloved teddy bear. Sounds like a nightmare, right? Well, fear not, because I'm here to save your sanity!
So, what's this magical solution I'm talking about? Drumroll, please... It's labelling your boxes! Yes, you heard it right. This comprehensive guide will walk you through what labelling supplies you need, to the more specific labelling system you can use and will no doubt become your golden ticket to an organised stress-free move. So let's get labelling.
Why does labelling matter?
First and foremost, let's understand why labelling truly matters. Labelling your moving boxes is akin to creating a roadmap for your move. It's the difference between chaos and order. Not only does it help you know what's inside each box without the need for X-ray vision, but it will also help you decide which boxes to unpack first when you’ve just moved into your new home. The importance of labelling doesn't stop there, it:
🌈 Makes sorting easier
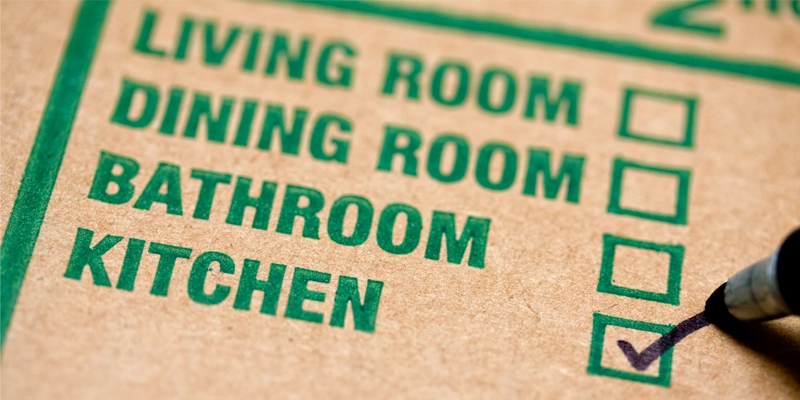
By clearly marking each box with its contents label and the room it belongs to, you eliminate the guesswork and confusion on your moving day. Imagine when the moving truck backs into your driveway at your new house and boxes are being offloaded like a conveyor belt at Santa's workshop. But thanks to labelling, the removalists are finding it easier because each box declares its room destination. No guesswork, just straight to the living room, kitchen, or to the man cave!
⚡ Speeds up the unpacking process
You make unpacking easier and the process becomes straightforward, allowing you to settle into your new space much quicker. With boxes labelled by category or room, you're not just unpacking; you're assembling your new life, piece by piece, room by room. You’ll be sipping that ‘Welcome Home’ cocktail way sooner than you think!
🕵️ Minimises lost items
Ever spent hours searching for the remote, your favourite mug, or the dog's leash? Labelling ensures that no item goes missing. You'll know which box holds your vital coffee supplies for that crucial first morning in your new home.
🧘 Lowers your stress
We underestimate how emotionally draining moving can be. Labelling is your zen zone. It’s like sending a love note to Future You saying, "I got you. Relax." Each clearly labelled box is a dose of reassurance that yes, you're this close to being completely settled in your new abode.
So when does labelling pay off? Literally at every stage—packing, moving, unpacking, and living. Think of it as a low-investment, high-reward venture. A few extra minutes now saves you hours later and gifts you peace of mind. And that, dear friends, is where the pay-off is for labelling.
Labelling supplies you'll need:
Your labelling journey begins with the right tools. You do not need anything fancy but you do need a few labelling essentials. Here's your shopping list:
1. Permanent markers
Purchase a good-quality permanent marker and opt for one with a fine tip to ensure clear and precise writing. Black is the classic choice, but feel free to add some colour if you're feeling adventurous. Sharpie is one of the most well-known brands for permanent markers. They offer a wide range of colours and tip sizes, and their markers are known for their durability and long-lasting ink.
2. Coloured stickers/labels
Next up, grab a set of coloured stickers or labels from Officeworks, Kmart or any stationery or crafts store. These will add a visual punch to your labelling system. Assign a colour to each room or category, making it easy to spot your target amidst the sea of boxes. For example, blue for the kitchen, red for the bedroom, and green for the living room.
3. Clear packing tape
Clear packing tape is more than just a box sealer, use it to secure your box labels and protect them from the rain. You can also easily write on clear packing tape should you run out of labels to use.
4. Label maker (Optional)
For those who crave order with a touch of tech, a label maker will help you label quicker. These devices create clear and professional-looking labels with ease. You can customise fonts, and sizes, and even add symbols. While not a must-have, if you have kids, it can be a fun way to get them involved.
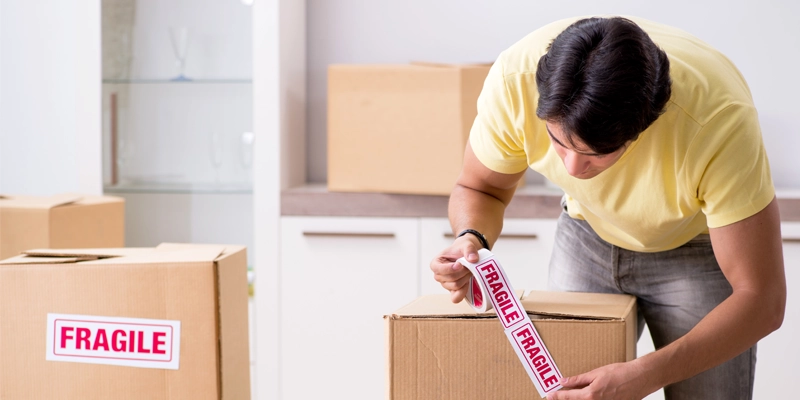
5. Fragile tape and labels for fragile items
Don't forget special labels and fragile tape for fragile items. You can find these pre-printed with "Fragile" or use red stickers to catch attention. It's your way of saying, "Handle with care" without uttering a word.
6. Large labels for priority boxes
Designate a handful of boxes as high-priority for immediate unpacking. Use larger box labels or distinct colourful ones for these boxes, making them stand out. Label them as "Open Me First" or "Essentials." This small touch will make your first day in the new place a breeze.
7. Ziplock bags and small containers
To keep track of small and loose items such as screws, bolts, or jewellery, it's a wise idea to invest in ziplock bags and small containers. Make sure to label them clearly, including a concise description and the corresponding room. If possible, attach the label to the furniture piece the items belong to. This simple step will help prevent these valuable little parts from getting lost.
8. Notebook or smartphone
Don't forget your trusty notebook or smartphone. Use it to keep a master list of what's in each box and its corresponding label. This digital or written reference will be your guiding star during unpacking.
Consider a labelling system
So, you've got your labelling supplies ready, but now comes the fun part—crafting your labelling system. Here are a few ideas:
🏠 Room-based labelling
- What it is: Room-based labelling is as straightforward as it sounds. Each box is labelled with the room it belongs to, like 'Kitchen,' 'Bedroom,' 'Bathroom,' and so on.
- Why it works: This system ensures that each box ends up in the right room at your new place, simplifying unpacking.
- Pro tip: Use different colours or bold fonts for room labels to make them easily distinguishable.
📦 Category-based labelling
- What it is: Instead of rooms, boxes are labelled based on their contents, like 'Books,' 'Clothes,' 'Electronics,' etc.
- Why it works: This system is fantastic for quickly locating specific items within a room. You'll know exactly which box contains your precious vinyl collection.
- Pro tip: Combine this with room-based labelling for a comprehensive approach.
🔢 Number-based labelling
- What it is: Each box receives a unique number, and a master list is created to match numbers with contents.
- Why it works: Ideal for those who love precision and control. You can track every item's location with ease.
- Pro tip: Include brief descriptions on the master list for quick reference.
🗂️ Hybrid systems
- What it is: Combining elements of different systems to fit your unique needs. For example, you might use room-based labelling for most boxes but incorporate category labels for essential items or high-priority boxes.
- Why it works: Customisable to your preferences and the specifics of your move.
- Pro tip: Make sure your hybrid system is clear and easy to understand for anyone helping with the move.
🧩 Symbols or colour coding
- What it is: Use symbols (e.g. stars, smiley faces) or colour coding alongside text labels to add an extra layer of organisation.
- Why it works: Symbols and colours grab attention quickly and can help simplify the identification process.
- Pro tip: Create a legend that explains the meaning of symbols or colours for easy reference.
💼 Priority labelling
- What it is: Reserve special box labels such as larger size labels for boxes that need immediate attention, such as 'Open Me First' or 'Essentials.'
- Why it works: Ensures that you have immediate access to crucial items during the first days in your new home.
- Pro tip: Use large, bold moving labels for priority boxes to make them stand out.
When choosing a labelling system, consider the size of your move, the number of boxes, and your personal preferences. Remember, the goal is to simplify your move and make unpacking a breeze. Whichever system you choose, a well-organised labelling approach is your secret weapon for a stress-free transition to your new home.
How to Label: Step-by-Step
Properly labelling your moving boxes may appear simple, but it can significantly reduce the time and stress involved in your move, as well as when you're settling into your new home. Allow me to guide you through the process, step by step:
Step 1: Gather your supplies
Before you start labelling, make sure you have all your labelling supplies on hand. You'll need:
Essential labelling supplies:
- Permanent markers
- Coloured stickers/box labels
- Clear packing tape
Optional labelling supplies:
- Label maker
- Fragile tape and fragile labels
- Large labels for priority boxes
- Ziplock bags and small containers
- Notebook or smartphone
Step 2: Sort your items
Before you start packing, take some time to sort your belongings. Group similar items together so that they can be packed into boxes with common themes. This will make the labelling process much more efficient.
Step 3: Choose your labelling system
Decide on the labelling system that works best for you, whether it's room-based, category-based, number-based, or a hybrid of these methods. Stick to one system to avoid confusion.
Step 4: Write clearly and conspicuously
When labelling, it's crucial to write clearly and visibly. Use your permanent marker and write large enough to fill the label and consider using bold letters for added visibility.
Step 5: Include the necessary details
Each label should include essential information, depending on your chosen labelling system:
- Room-based labelling: Write the name of the room where the box belongs (e.g. "Kitchen," "Bedroom").
- Category-based labelling: Specify the category of items inside (e.g. "Books," "Dishes").
- Number-based labelling: Assign a unique number to each box and maintain a master list with detailed box contents.
Step 6: Use colour coding or symbols (Optional)
If you've opted for a colour-coded or symbol-based labelling system, make sure to apply these consistently. For example, if red labels indicate "Kitchen," stick to this colour throughout the move. Create a legend that explains the meaning of colours or symbols for reference. If there are other people other than yourself who will take part in the labelling process, ensure the legend is communicated clearly so everyone understands it.
Step 7: Label fragile items clearly
For boxes containing fragile or delicate items, use moving labels that clearly indicate their delicate nature. Here you can use your fragile packing tape to seal the box or use special fragile stickers. If you forgot to pick up fragile tape or labels as part of your labelling supplies we have some free printable ones below otherwise, you can improvise and write "Fragile" on a piece of white paper with a red permanent marker and tape it to the box with clear tape to ensure careful handling.
Step 8: Priority boxes
Use your special labels to identify priority boxes with labels like "Open Me First" or "Essentials." These should stand out from the rest, making it easy to locate essential items as soon as you arrive at your new home.
Step 9: Label all sides of the box
To make identification easy, label all four sides and the top of each box. This ensures that no matter how your boxes are stacked, you can quickly identify them without the need for rotation.
Step 10: Maintain a master list (For Number-based systems)
If you're using a number-based system, keep a master list of box numbers and their contents. This will be your reference when you need to find specific items.
By following these steps, you will not only streamline the moving process but also guarantee that unpacking and settling into your new home becomes effortless.
Additional tips
Labelling your moving boxes is more than just slapping on a name; it's about setting yourself up for a seamless transition to your new home. Here are some additional tips to elevate your labelling game:
- Label fragile items with care - When labelling boxes containing fragile items, be extra specific. Include "Fragile" or "Handle with Care" labels to alert movers and prevent accidents.
- Include handling instructions - For boxes containing delicate or sensitive items, include handling instructions on the label. For example, "This Side Up" or "Do Not Stack."
- Create an "Open Me First" box - Designate one box as your "Open Me First" box. Fill it with essentials like toiletries, a change of clothes, important documents, and a few kitchen items. Make it easily identifiable with a special priority label.
- Colour-code for speed - If you're using colour-coded labels, assign a specific colour to priority boxes or items you'll need immediately upon arrival. This visual cue will help movers and you locate crucial items quickly.
- Use large labels for priority boxes - For priority boxes, such as those with items for daily use, use larger labels or stickers. The bigger the label, the more attention it grabs.
- Label all sides of the box - This is so that no matter which direction you are facing or how the moving boxes are stacked, you can easily identify the box without the need to unstack.
- Use descriptive labels - When labelling, be as descriptive as possible. Instead of just "Kitchen," you might write "Kitchen - Pots and Pans" or "Kitchen - Glassware."
- Photograph the labels - Take pictures of the labels on your boxes before you move. In case a label gets damaged or falls off during transit, you'll still have a visual reference.
- Number boxes for easy counting - Assign numbers to your boxes, and keep a corresponding list of box contents. This makes it easy to ensure that all your boxes arrive at your new home.
- Prepare labels in advance - Before the big moving day, pre-label a stack of stickers or labels with room names or categories. Having them ready will streamline the packing process.
- Label outside and inside boxes - It is recommended to label both the outside of the box and the inside of each box. This practice ensures that you can easily identify the contents of each moving box, even when the box is closed or the label is torn from the outside, you will still be able to identify the contents of the box as soon as you open it.
- Label electronics cables and accessories - When disassembling electronics, it is advisable to place cables, screws, and accessories in labelled bags or containers. Ensure that the label includes the name of the device and attach it to the electronic device as a whole. This practice not only helps with organisation but also simplifies the reassembly process.
By incorporating these additional labelling tips into your moving process, you'll not only simplify the logistics but also reduce the stress that often accompanies a move. And of course your moving company will thank you for it.
Common labelling mistakes to avoid
Labelling your moving boxes might seem straightforward, but there are common mistakes that can lead to confusion, delays, or even mishaps during your move. Here are some pitfalls to steer clear of:
1. Incomplete labelling
Mistake: Labelling boxes with vague or incomplete information, such as simply writing "Miscellaneous" or "Stuff."
Why it's a problem: You won't know what's inside each box, making unpacking a frustrating guessing game.
Solution: The better way is to be specific. Include details about the box's contents, room destination, or category to help you and your movers.
2. Using non-permanent or fading markers
Mistake: Using non-permanent markers or low-quality markers that fade easily.
Why it's a problem: Labels may become illegible, leaving you clueless about box contents.
Solution: Invest in high-quality permanent markers with fine tips. Check the ink's permanence rating.
3. Skipping labels on all sides
Mistake: Labelling only one side of the box, assuming it will always face the right way.
Why it's a problem: Boxes may be stacked or turned in different directions during transit, making labels inaccessible.
Solution: As a minimum label two opposing sides and the top of each box for easy identification, but if you want to label proof so that you can identify the box no matter how they are arranged, label ALL sides!
4. Overloading boxes and ignoring "Heavy" labels
Mistake: Overloading boxes with heavy items and failing to label them as "Heavy."
Why it's a problem: Heavy boxes can break or become difficult to handle, leading to potential damage or injuries.
Solution: Clearly mark boxes containing heavy items as "Heavy" and distribute weight evenly.
5. Not labelling fragile items adequately
Mistake: Neglecting to label boxes with fragile items as "Fragile" or not use bubble wrap properly.
Why it's a problem: Delicate items may get damaged during handling if not treated with care.
Solution: Clearly mark boxes with fragile items and use appropriate packing materials for added protection.
6. Ignoring valuable or high-priority boxes
Mistake: Failing to identify boxes containing valuable or essential items.
Why it's a problem: You might have to rummage through numerous boxes to find critical items.
Solution: Label valuable or high-priority boxes as "Open Me First" or use distinct labels.
7. Using inconsistent labelling systems
Mistake: Switching between labelling systems, such as room-based and category-based, without a clear plan.
Why it's a problem: Inconsistency can lead to confusion when unpacking.
Solution: Stick to one labelling system throughout your move to maintain clarity.
8. Ignoring handling instructions
Mistake: Omitting handling instructions like "This Side Up" or "Do Not Stack" for fragile or sensitive items.
Why it's a problem: Removalists may mishandle boxes, resulting in damage.
Solution: Clearly communicate handling instructions on the labels to ensure proper care.
9. Not Creating a master list (for Number-based systems)
Mistake: Using a number-based system but neglecting to maintain a master list of box contents.
Why it's a problem: You'll lose track of what's in each box.
Solution: Keep a detailed master list corresponding to box numbers.
10. Last-minute labelling rush
Mistake: Waiting until the last minute to label boxes, leading to hasty and inaccurate labelling.
Why it's a problem: Boxes may not be properly labelled, causing confusion and delays.
Solution: Be sure to label boxes as you pack them to ensure accuracy, saving you time along the way.
By steering clear of these all-too-common labelling blunders, you'll be paving the way for a smoother and more organised move. Thoughtful and crystal-clear labelling is a little effort that's totally worth it when you're knee-deep in the chaos of relocating.
Final thoughts
Finally in the grand symphony of moving, labelling your boxes is the key to unlocking a smooth transition to your new home. We've explored the art and science of labelling, from the supplies you need to crafting a well-thought-out labelling system. We've also covered additional tips and common mistakes to ensure you're fully equipped for this organisational adventure.
Labelling isn't just about marking boxes; it's about gifting yourself peace of mind, time saved, and stress reduced. It's about knowing exactly where your coffee maker is when you need that first caffeine hit in your new kitchen and ensuring your fragile treasures are handled with care. Your labels are your guideposts, your GPS in the moving maze.
So, pick up that marker, choose your system, and label your way to an organised move. Embrace the power of labelling, and you'll find that your move transforms from a chaotic shuffle into a well-choreographed dance. Happy moving!
Ready to Move? Find Your Perfect Mover!
Don't let moving stress you out. Compare quotes from our network of reliable movers, read genuine reviews, and book with ease. Save time, save money, and start your move with confidence today.
- Quickly compare movers
- Read verified reviews
- Book online with confidence
